Sharing Recorded Content With Students
Overview
So you’ve recorded a video: now what? This how-to guides you through your options for actually sharing that media with your students. (If you’re looking for info on actually making a recording, we suggest that you first check out our tutorial on recording in Zoom.)
The best process for you will depend on a number of factors: what kind of content you’ve made, the device you’ve made it on, and even where your remote students are based.
Below, you’ll find a basic walkthrough of the process for uploading to VoiceThread, our recommended option, as well as a few notes on and comparison between alternatives.
Uploading to VoiceThread
VoiceThread is your best bet for sharing media content with your students for several reasons: it has unlimited storage, it doesn’t require them to make an extra account, it adds auto-captioning that makes your content more accessible, and it’s available to students in China. It also has a number of useful extra features like audio comments and VoiceThread assignments.
You’ll need to get VoiceThread set up for your class before you use it to share course content. We highly recommend using these tools for sharing large files rather than uploading directly to Moodle itself, or using Zoom’s Cloud Recording, as both have limitations in terms of storage capacity and performance. This brief overview walks you through account set up. More info about creating VoiceThreads and linking them to Moodle is also available here.
On Your Computer
Once your VT setup is complete, you can share your media by creating a new VoiceThread. If you’re on a Mac or PC computer, you can simply follow our tutorial on creating a VoiceThread.
In the first part of that VT creation process, you’ll just upload the video you’ve created. In the second part, you can skip adding commentary if you’ve already recorded audio. In the third part, you just have to share the VoiceThread with your class. You can then either direct your students to the class VT page, or link to the VT directly.
Via an iPad
If you’ve created your content on an iPad, you can use the VoiceThread app to directly upload it. The below steps describe that process.
- If you haven’t already, download the VoiceThread app via the App Store.
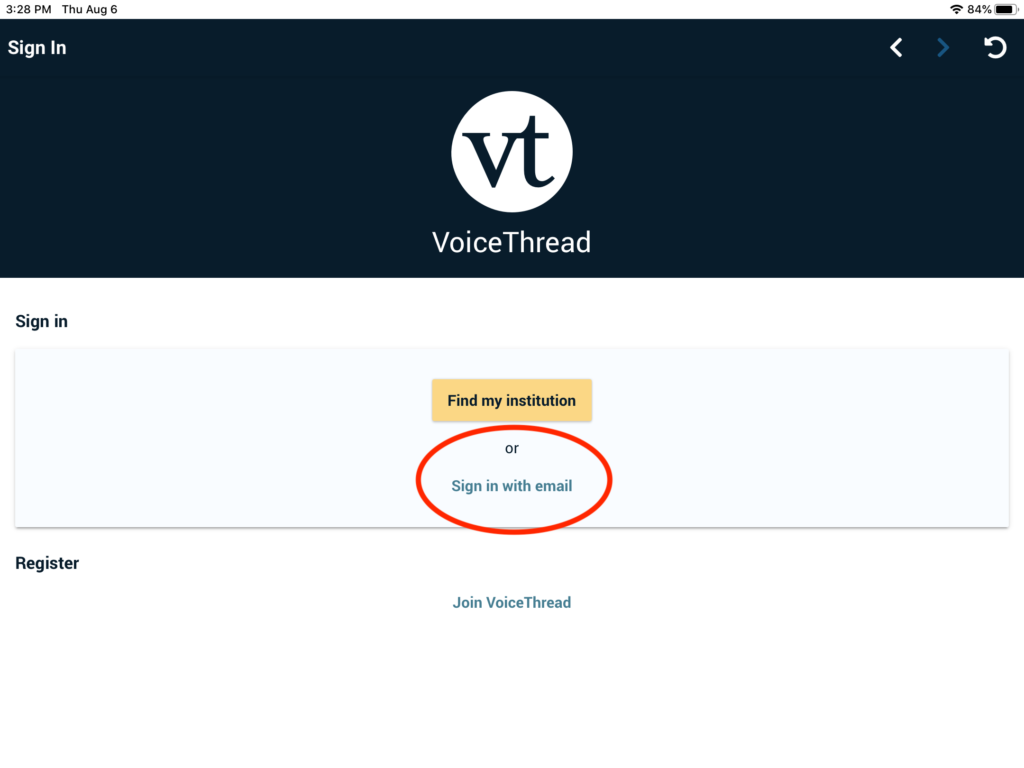
- Open the app, choose the “Sign in with email” option, and enter your Macalester credentials.
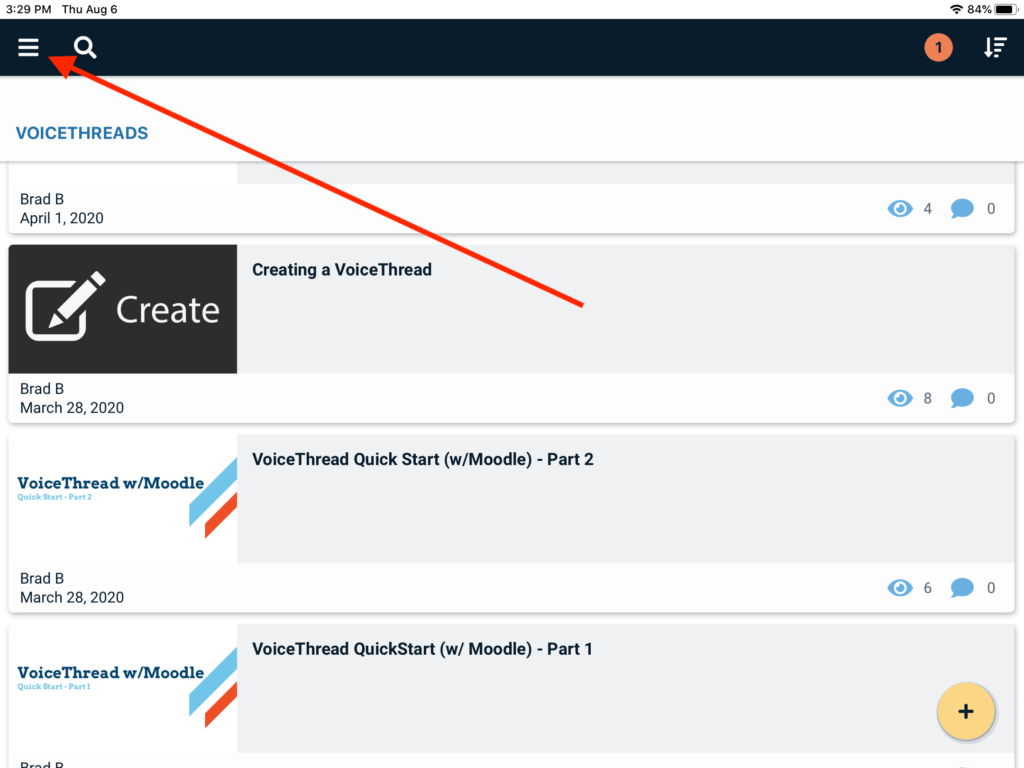
- Open the main menu with the top-left menu icon:
- Navigate to your class by selecting “Groups,” and then your course name.
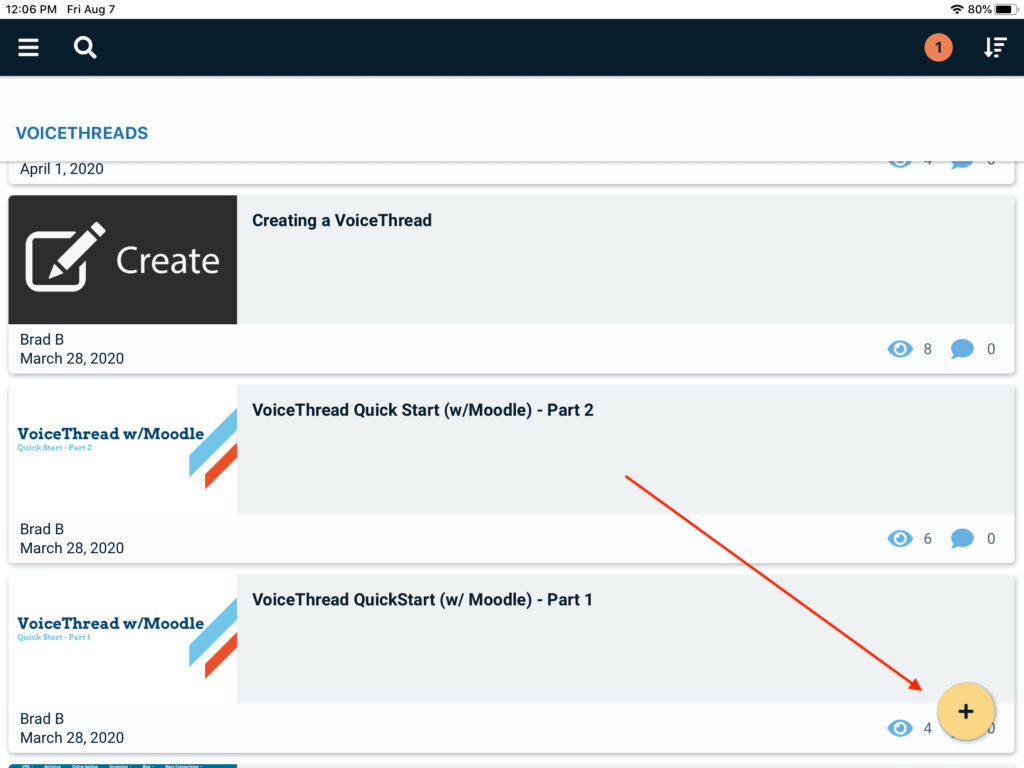
- Once in your course, you’ll want to create a VoiceThread by using the yellow + button on the lower right:
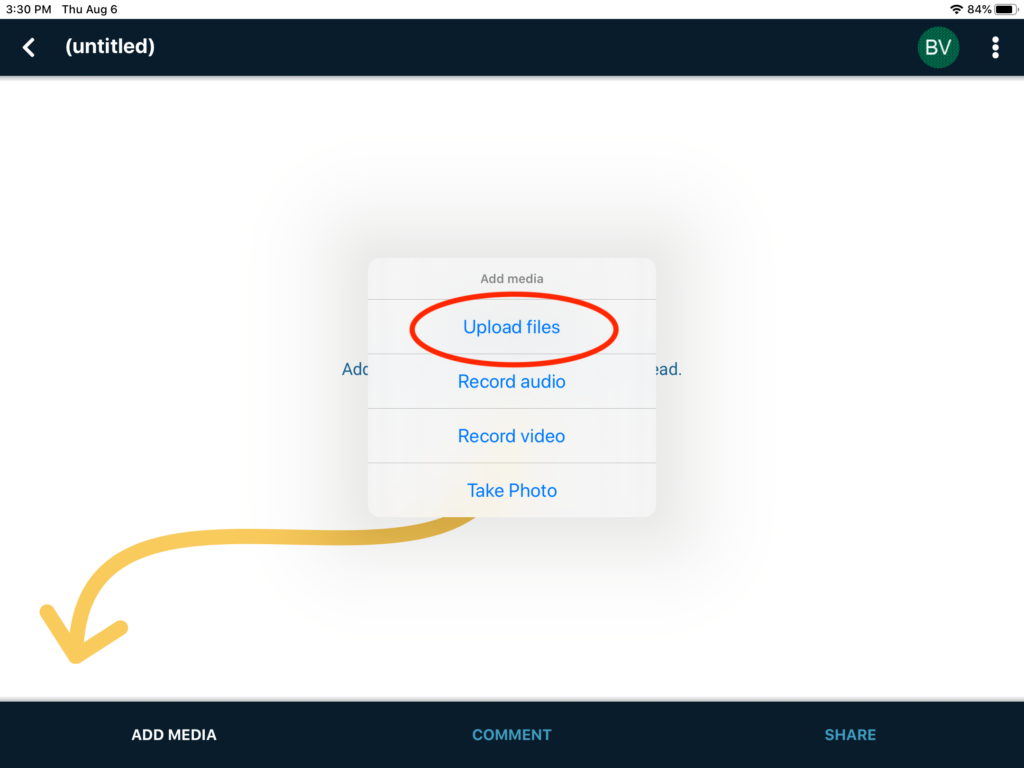
- Once here, you’ll select “Add Media,” and then “Upload files,” which opens up your Photos on your Mac.
- Select the recording and click “Done” on the top right.
- From here you can add more recordings (if you want multiple “slides” or videos for this single topic) or record audio comments.
- Once you’re ready, use the back button on the top left. You’ll be prompted to give your VoiceThread title, and set your sharing options. (You can also set sharing options using the link on the far right of the content creation page. You’ll need to do this if you didn’t navigate to your course earlier.)
- Your students will now be able to view via VoiceThread. You can create a direct link (choose the “Individual VT” option) to the resource on your Moodle page, or refer them to the course VT page (choose “Course View”).
Alternatively, you can use a Google Drive workflow to get the content from your iPad to your computer, and then upload it to VoiceThread that way.
Alternatives
If you would prefer not to use VoiceThread, you do have a few good alternatives.
Uploading files to Google Drive and then linking to those files on your Moodle page is one efficient method: all Macalester students already have a Google Drive account, and most of the functionality is drag-and-drop.
Another good approach is putting videos on Youtube, though by design you have fewer controls over privacy.
The chart below offers a direct comparison between these options:
| Voicethread | Google Drive | YouTube | |
| Easily accessible in China | Yes | No | No |
| Auto Captioning | Yes | YNo | Yes |
| Integrates directly with Moodle | Yes – can upload content to VT through Moodle | No – must upload in Drive and create a link in Moodle | No – must upload to YouTube and create a link in Moodle |
| Allows for commenting | Multimedia (text, audio, video) comments | No | Yes, can comment of the full video directly on YouTube |
Regardless of your approach, we strongly recommend that you do not upload video directly to Moodle itself, or use Zoom’s Cloud Recording storage, as both have limitations in terms of capacity and performance.
We also encourage you to get in touch with your AIA if you’d like help with any of this.