Create a Transcript of a Recorded Zoom Meeting
Creating a written transcript from interviews and presentations is now possible when using the closed captioning feature in Zoom. Make sure you are using Macalester’s Zoom account by logging in at macalester.zoom.us.
- Start a meeting
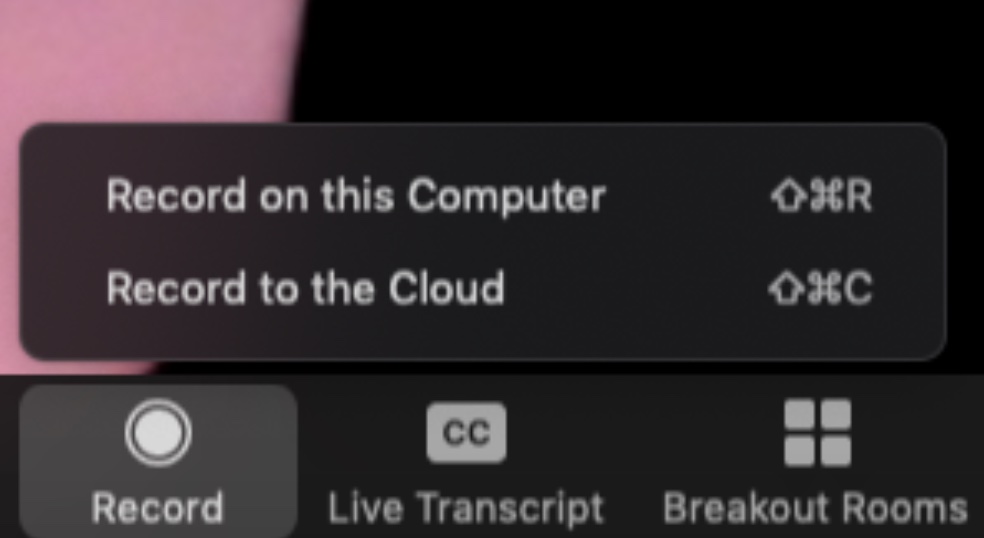
- The host starts recording by selecting the Record icon on the bottom of the Zoom screen.
- Select Record on this Computer
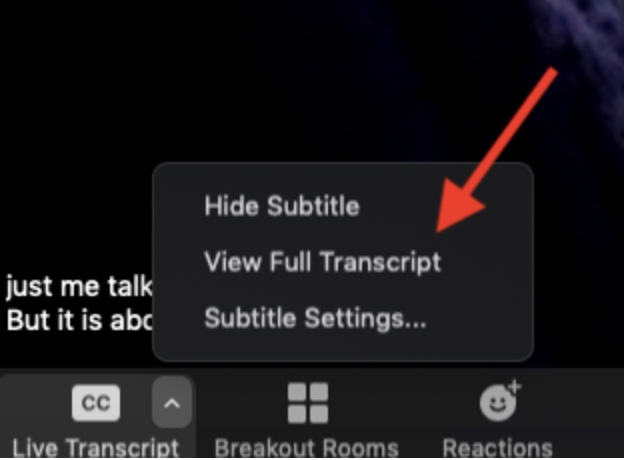
- The host may enable Live Transcript by selecting the CC icon on the bottom of the Zoom screen
- Select Enable Auto-Transcription
- If you would like to a running account of everything being said, enable View Full Transcript. To enable go to macalester.zoom.us > Settings > In Meeting (Advanced) > Closed Captioning. Check “Allow viewing of full transcript in the in-meeting side panel. You now have the option to View Full Transcript.
- Before the end of the meeting select Save Transcript in the bottom of the Full Transcript window.
- When the meeting ends, the recording will automatically be saved to the computer in Documents > Zoom. Each meeting is saved in a folder named with the Date and Meeting Name.
- This folder will contain the following:
- zoom_0.mp4 — video file
- audio_only.m4a — audio only file
- closed_caption.txt file — created by selecting Record to this Computer in Step 3.
- meeting_saved_closed_caption.txt — created by selecting Save Transcript in Step 7.
The .txt files will look like this. You can open this file in Word or copy and paste it into Google Docs or Microsoft Word.
Finally: You must turn on Live Transcript to get the above text document. The above steps create duplicate files of your conversation in case you forget to select Save Transcript or to Record your meeting. Better safe than sorry!