Digital Whiteboarding and Annotation With an iPad
This guide offers an overview of using an iPad and Apple Pencil for digital whiteboarding and annotation. It covers the basics of setting up an iPad with Zoom, but also offers suggestions about using the iPad in class, iPad workflows, and annotation apps.
Connecting Your iPad in Zoom
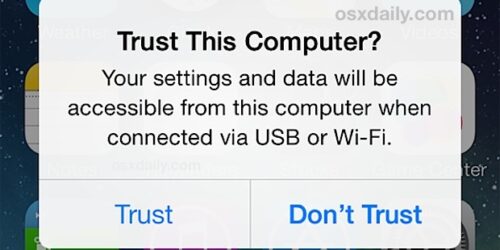
First things first: to share anything on your iPad screen with your students, you’ll need to get Zoom to see your iPad. This applies regardless of what app you’re using or how you’re using it.
One important note: in almost all cases, you’ll want to host your Zoom class meeting from a laptop, and treat your iPad as a secondary screen. Hosting from a laptop offers a much more robust experience than from a mobile device like an iPad.
How to get your iPad and laptop to communicate depends on the kind of computer you’re using, and, because of security settings on campus, where you’re hosting remote class — whether you’re on campus or at home. We outline several steps below.
Connecting to a PC
If you’re using your PC on campus, you’ll need to simultaneously join your Zoom meeting from both your laptop and your iPad. (This is due to a wireless security setting on campus.) This brief video tutorial from AIA Eric Handler will walk you through this process. Note that this method is a good failsafe for any situation — it works at home or on campus on both Macs and PCs.
If you’re using your PC off campus, the easiest way to connect your computer and your iPad is via AirPlay. This brief video tutorial from AIA Eric Handler will walk you through making that connection.
Connecting to a Mac
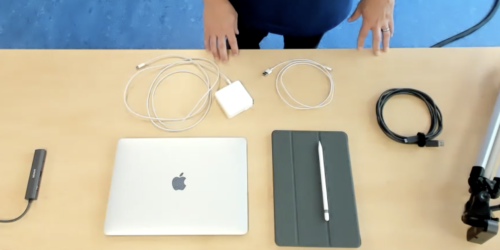
If you’re using your Mac on campus, the easiest way to connect your computer and your iPad is via your charging cable. This brief tutorial walks you through this process.
If you’re using your Mac off campus, you have the most options. You can use Airplay, the wireless option. (The steps in the above video for PCs will be very similar to those on the Mac.) You can also use the cable method, just like you would on campus. Finally, there’s always the option of joining from both your laptop and your iPad.
Using Your iPad For Annotation
Once you’ve successfully connected your iPad to Zoom, you have lots of options for how to use it.
Zoom itself offers basic, built-in whiteboarding functionality, which allows you to write or draw on a blank whiteboard or annotate anything on a shared screen.
Powerpoint also allows annotation when used with a iPad and a stylus like the Pencil, which might be useful for presenting slide decks. This brief tutorial covers Powerpoint annotations. More information on setting up Microsoft Office (including Powerpoint) on your iPad is also available here.
The iPad and Pencil can also be used outside of class time for things like grading and commenting. You can grade with an Apple Pencil in Moodle’s built-in PDF Grader, for instance. This tutorial walks you through one good way for making handwritten annotations on emailed assignments.
More advanced apps like Notability can streamline whiteboarding and annotation and add even more features. This how-to lays out a workflow for using Google Drive and Notability together to easily get documents and annotations on and off your iPad. You can find further suggestions of apps to try below.
Whiteboarding and Annotation Apps
While we don’t have a one-size-fits-all recommendation for a whiteboarding and annotation app, we can offer the following suggestions, based on our experience and those of faculty on campus.
- Notability – an advanced note-taking and annotation app that’s especially useful for importing, exporting and organizing annotated documents.
- GoodNotes – an advanced note-taking and annotation app that’s especially useful for importing, exporting and organizing annotated documents.
- Notes – the built-in iOS app
- ShowMe – a basic whiteboarding app.
- OneNote – part of the Office suite, this is Microsoft’s annotation product