Using Groups in Perusall
Overview
In Perusall, you can organize students into groups that limit whose comments they see.
This can be useful when you have a large class and want to reduce the volume of annotations any single student is seeing, or if you want to create smaller cohorts where students might assume certain roles (skeptic, synthesizer, etc.) as readers and responders.
You can also use the group functionality as a workaround for giving individual feedback, or having individuals comment on a task — if you put each student in a group of one, they’ll only be able to see comments they themselves left, or responses from their instructor.
Creating Groups
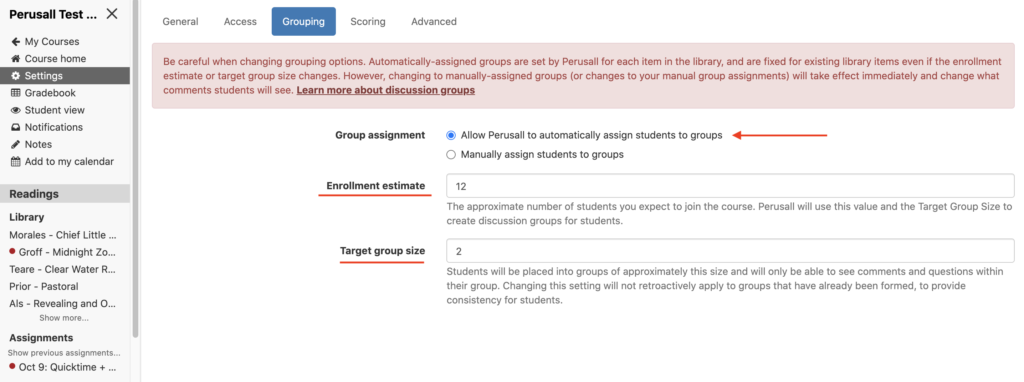
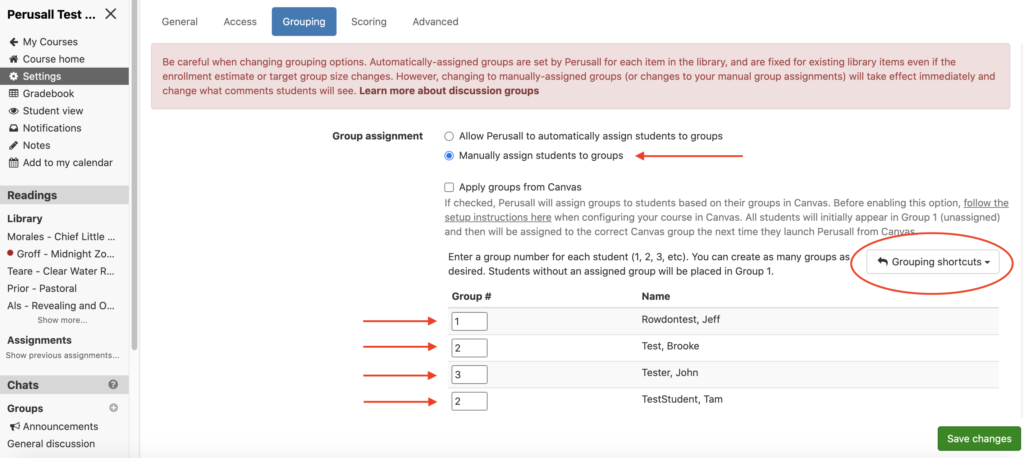
To get groups set up in your course in Perusall, you’ll need to visit Settings in the left-hand menu, and then select the Grouping tab:

This will present you with the two options for creating groups: automatically or manually. More details on these options follow.
One important side note: you’ll only see students in your course who have accessed Perusall at least once. Students who join a course with automatic groups enabled will be automatically added into the existing group structures. But if you’re planning on assigning groups manually, you may want to wait until most or all of your students have logged in. A good way to encourage this: create an early practice assignment, such as annotating the course syllabus with a question.
Automatic Groups
Automatic groups are randomly assigned by Perusall. These groups are different for each library item, which means that they are not consistent across the semester. The idea here is that students in a larger class get to see and respond to the comments from a variety of their peers.
If you go this route, you simply specify the number of students you expect to enroll in the class, and the approximate size of each group:
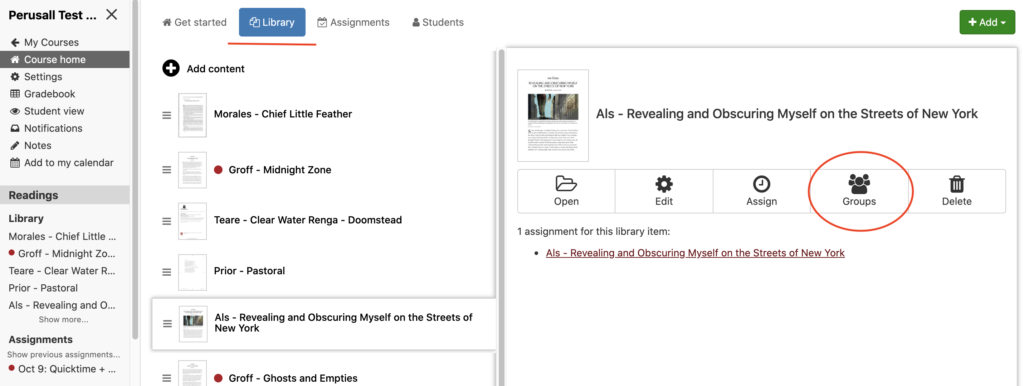
To see how Perusall has sorted students into groups, visit your Library. You can view the group for a particular reading by selecting it there, and then clicking the “Group” button:
From this menu, you can see the membership and size of each group, and also reshuffle the automatic groups using the button at the bottom:
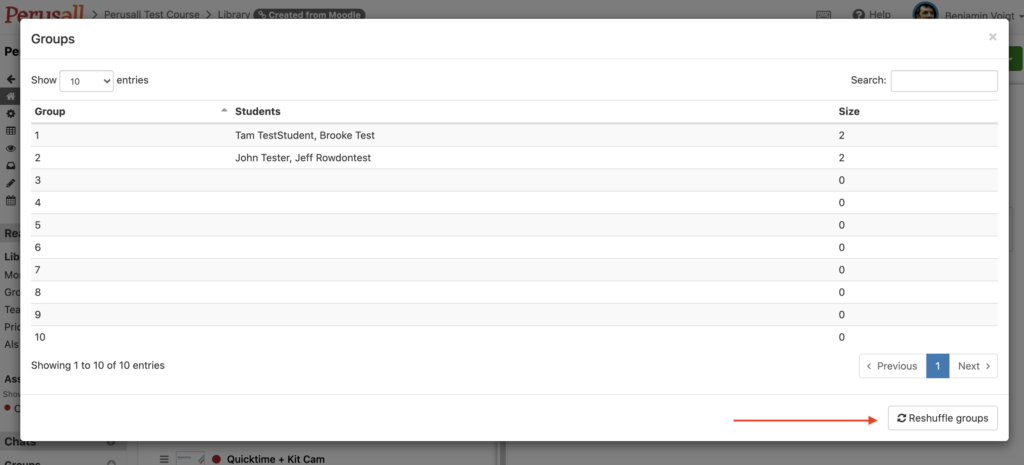
Note that you can only access this Groups menu when groups are automatically assigned. (It’s not available in manual groups.)
Manual Groups
Manual groups are assigned by the instructor. Each student must be put into a numbered group. Students will only see the comments of folks in that group. There are present “shortcuts” (groups of 3, groups of 4, etc.) that help streamline the process of sorting/assigning groups.
These manual groups are designed to stay constant throughout the semester — you don’t have different grouping options for different assignments. You can reassign groups manually, even after assignments are completed and comments have been posted, but this will retroactively change visibility. For example: if Student A is moved from Group 1 to Group 2, their previous comments will no longer be visible to students in Group 1, only by students in Group 2. This can also result in Student A not being able to see their own comment, if it was a reply to another student still in Group 1.
Because of this, we recommend that you be careful when reassigning groups, whether they’re automatically or manually created.